Table of Contents
The Navigation Window
Figures 1 through 3 show examples of the ECG displays for the 1-lead, 2-lead, and 3-lead long telemetry ECGs. The interface consists of two regions.
- The Analysis Windows: the top region(s) of the ECG display
- You will use these region(s) to interact with the ECG using calipers
- Shows the portion of the ECG contained in the Navigation Box located in the Navigation Window
- The Navigation Window: the bottom region of the ECG display
- You will use this region to zoom in and out on and to move around the entire ECG
- The Navigation Window shows the entire telemetry strip at a lower resolution.
- Use this region get a view of the entire ECG


Important
The Navigation Window displays the entire ECG to be analyzed, while the Analysis Window only contains the contents of the Navigation Box. When selecting the diagnoses that comprise your interpretation, be sure to analyze the entire ECG shown in the Navigation Window.
The Navigation Window functionality is described using the UI for the 2-lead long telemetry ECGs shown in Figure 4. The functionality is the same for all long telemetry ECGs.

The Navigation Box

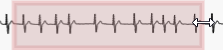
The Navigation Window provides a low-resolution view of the entire telemetry strip, offering an overview of its contents. The pink box in the Navigation Window is called the Navigation Box. The Navigation Box serves three purposes:
- Display Control: Defines the region of the telemetry strip shown in the Analysis Window, allowing you to navigate across the strip.
- Zooming: Enables zooming in and out of the ECG.
- Movement: Facilitates easy navigation across the entire telemetry strip.
Zooming
To zoom in or out, position the mouse cursor on the edge of the Navigation Box. The cursor will change to either  , indicating you can resize the Navigation Box horizontally, or
  , indicating that you can resize the Navigation Box vertically. See Figure 5 for examples of the cursor changes when the Navigation Box can be resized.
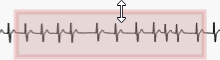
Once the cursor changes, press and hold the mouse button, then drag in the desired direction to resize the Navigation Box. As you resize, the ECG in the Analysis Window will adjust accordingly, becoming larger or smaller. Figure 4 illustrates this process, showing how resizing zooms in on the ECG.

Moving Around the ECG
There are two ways to move the Navigation Box around the Navigation Window to update the portion of the ECG shown in the Analysis Window(s).
The first method is to drag the Navigation Box:
- Position the mouse cursor inside the Navigation Box. The cursor will change to
 , indicating movement is possible.
 - Press and hold the left mouse button, then drag the Navigation Box to the desired location.
- As you move the Navigation Box, the Analysis Window updates to display the corresponding region of the ECG.
The second method is to teleport the Navigation Box:
- Position the cursor in the Navigation Window outside of the Navigation Box where you want to move the Navigation Box.
- Click the left mouse button.
- The Navigation Box will teleport to be centered on the new location, and the Analysis Window(s) will update to show the corresponding region of the ECG.
Figure 4 shows the result of moving the Navigation Box to the right in the Navigation Window.

Updating the Lead
To update the lead shown in the Navigation Window for 2-lead and 3-lead long telemetry ECGs, click on the desired lead in the Analysis Window region.

Information Regions
The Navigator Region contains two information regions:
- The Top Region: located at the top of the Navigator Window
- The active lead is shown in the upper left corner
- If present and ladder diagrams have been toggled on, the grey-shaded regions indicate where ladder diagrams have been drawn for the ECG
- If present and annotations have been toggled on, colored vertical lines indicate where annotations have been added to the Analysis Window for the ECG
- The Bottom Region: located at the bottom of the Navigator Window
- Show the time into the ECG
Examples of these regions are shown in Figures 10 and 11.

